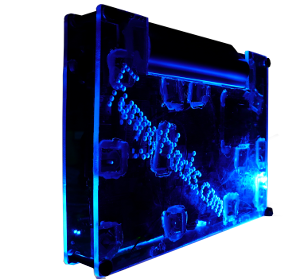
Today I show you the semi-working prototype of the final tablet.
While I made prototypes of many parts, this was the only one bringing everything together, and there was still learning to be had!
Gromets between the nuts and the perspex reasonably solved the issue of the nuts coming undone. I say "reasonably" because it still came undone occasionally under heavy use. If it bothered me enough I'd put a tiny bit of glue on the nuts. Enough to stop them accidentally moving, but not so much to seal it for ever. Something to be aware of when relying on glue is that when you show people a hack like this, they tend to fiddle with all the fastenings as they are curious how everything fits together. This will happen, so it's worth taking into account when choosing how everything is going to fit together. I've never seen this done maliciously :)
Layout. I did change my mind a few times with the prototype tablet. Notice in the top left corner there are 3 holes: 1 is for a mouse button, 1 for the table for the touch pad, and one is where I was originally going to put the touch pad. This is one of the beauties of a prototype. You want to make this mistake as few times as possible when working on the final thing. In the photo gallery of /tabletbuild you can see the plans I made for the layout. This helped me to get it right first time. Note that I did deviate from the plan a little. I explain why in the video for that episode.
I did the battery mount very different between the two tablets because the batteries were so different in the original netbooks. The netbook that the prototype was built from had a built-in LiPo battery that was pretty much glued in place, while the final one had a Lion based battery pack. I considered opening it up and mounting it the same way as the prototype, but this would have reduced my ability to interchange batteries, and seemed like unnecessary butchering.
Glue. The hot glue I used in the final tablet is not the same as the prototype. Sadly I wasn't able to find the glue I used in the first one. It was one I bought on the other side of the world, and I couldn't even remember the name of it.
LED position. On the prototype I put these at the bottom. The trouble with this is it prevented the tablet from resting on a surface nicely, and it would have been one of the first things to break if I used it often. So on the final thing I put them on the side.
Lighting up the electronics. This was something I really liked about the prototype. On the final thing there simply wasn't enough room to make it worthwhile. I may play with the idea further in the future, but for now it is how it is.
Above: Imported image from the old system
Above: Imported image from the old system
Above: Imported image from the old system